Setting up the Raspberry PI Media Player
So I just finished setting up my Raspberry PI media player and thought I would write about it while the process was fresh in my mind.
For background see this post.
The Hardware
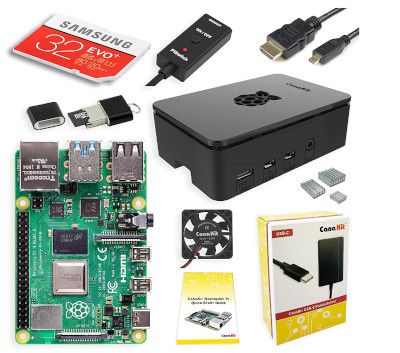
I happen to have a Raspberry PI 4 that was a gift for my last birthday. I ask for them sometimes when someone does not know what to get me and asks and I can't think of anything else. I will probably replace this one with a new one if it becomes part of the media center. At this writing you can get them on Amazon for about a hundred bucks. This one is a CanaKit the ad for which has this picture:
Keyboards
I needed something to use for input. I wanted a mini-keyboard of a remote control. I read a lot of reviews and could not find something that had not failed for someone. I tend to always read the one star reviews and decide if I can live with the problems those reviews had. (But I am always willing to send a out-of-box failure back.) Finally I just picked one remote and one keyboard (they was all pretty cheap).
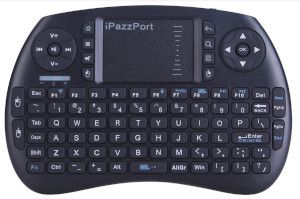
Here is the micro keyboard I picked (it's available on Amazon):
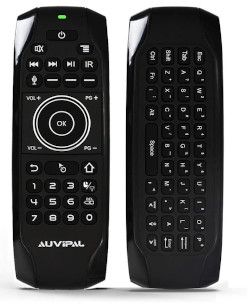
And the remote (also from Amazon):
First Impressions
I've had the controls for a couple of days now. I really like the mouse pointer on the remote control looking one, but the keyboard is very slow to use. The little keyboard is better as a keyboard but a little clunky to hold since you need both hands. For now I will have both and see which I really use most.
I am surprised how many of the keys actually work. I was really surprised the volume control and mute work with Plex Player and the web browser. The next track and pause play buttons work too. All very nice.
Both mouse pointer systems work ok. The one on the keyboard is a little touchy and you can end up scrolling when you want to move the mouse. The "air mouse" on the remote is hard to hold still to get a double click, but otherwise great. It works particularity well with Plex Media Player.
Cables
The last thing I needed is an HDMI adapter. The PI 4 has micro-HDMI and the cables already in the TV stand are standard HDMI on both ends. So I ordered a couple of these adapters which should work fine.
The other cables that are connected to the Roku I am replacing should work fine.
Cost
If I was buying the PI 4 new it would be about $100 and the two keyboards together were less the $40. The HDMI adapters were about $10 for two. So I am into it for about $150 so far. (Of course, I already had the PI 4 which I can reclaim if it does not work out). So, quite a bit more than a new Roku. But, the new Rokus don't have analog stereo out and the PI does. Well it turns out that I could not use the built in analog audio, see section at the end. I ended up adding a DAC for about $37 bringing the total so far to about $190. More than I intended, but it seems to fill the purpose I built it for.
Software Setup
As I said, I want to run Plex Media Server (PMP) on the PI. This means I had to build it from source. I found instructions to do it here, and they almost worked.
But the first step is to install a fresh OS on the PI (it's running 64 bit Debian right now). I downloaded Noobs, but I made the mistake of downloading the full install (some 2.6 GB). When what I needed was just the installer because the recommendation is to NOT use the version with all of the recommended packages. When you do that, Noobs downloads another copy of the OS. (Some wasted time, but no damage done.)
Initial Setup
The first thing I always install on a new system is XRDP. This allows me to get into the system with terminal services (I use Remmina). So the new system can be headless if needed. In this case it will make administration simpler once the system is installed.
Here are the commands:
sudo apt-get install xrdp
sudo apt remove dbus-user-session
sudo apt install dbus-x11
sudo reboot
Using dbus-x11 instead of dbus-user-session allows a single user to log in with multiple GUI sessions. Rebooting is not strictly necessary, but it makes sure everything will work without a monitor and keyboard when the system powers up in it's final location.
Now when we attach we see:
Next at the recommendation of the PMP, I upgraded the entire system.
sudo apt update
sudo apt full-upgrade
This didn't do much since it was a brand new system.
Building Plex Media Player
The first step in building PMP was to install a whole host of dependencies and libraries. This list is from the original source:
sudo apt install -y autoconf make automake build-essential gperf yasm gnutls-dev libv4l-dev checkinstall libtool libtool-bin libharfbuzz-dev libfreetype6-dev libfontconfig1-dev libx11-dev libcec-dev libxrandr-dev libvdpau-dev libva-dev mesa-common-dev libegl1-mesa-dev yasm libasound2-dev libpulse-dev libbluray-dev libdvdread-dev libcdio-paranoia-dev libsmbclient-dev libcdio-cdda-dev libjpeg-dev libluajit-5.1-dev libuchardet-dev zlib1g-dev libfribidi-dev git libgnutls28-dev libgl1-mesa-dev libgles2-mesa-dev libsdl2-dev cmake python3 python python-minimal gitThat took a long time!
The next step is to clone mpv and build it. This may not actually have been necessary, as we will see later. In any case here is the command to clone it.
git clone https://github.com/mpv-player/mpv-build.gitThen we set some compile options for it:
cd mpv-build/
echo --enable-libmpv-shared > mpv_options
echo --disable-cplayer >> mpv_options
Tell it to build the release version:
./use-mpv-release
./use-ffmpeg-release
Build it:
./rebuild -j$(nproc)And install it:
sudo ./installTell the OS to use the new versions:
sudo ldconfigNext we download and install the QT library:
cd ..
mkdir qt
cd qt
wget https://files.pimylifeup.com/plexmediaplayer/qt5-opengl-dev_5.12.5_armhf.deb
sudo apt-get install -y ./qt5-opengl-dev_5.12.5_armhf.deb
Once installed you don't need the deb file anymore. So you can remove it:
rm qt5-opengl-dev_5.12.5_armhf.deb
cd ..
rmdir qt
Next we get the source for PMP:
cd ~
git clone https://github.com/plexinc/plex-media-player
And now finally we can build PMP:
mkdir ~/plex-media-player/build
cd ~/plex-media-player/build
cmake -DCMAKE_BUILD_TYPE=Debug -DQTROOT=/usr/lib/qt5.12/ -DCMAKE_INSTALL_PREFIX=/usr/local/ ..
make -j$(nproc)
And install it:
sudo make installEverything went great up to this point. Now it was time to run it:
plexmediaplayer --fullscreen --tvAnd it aborted. I saved the message it got when it aborted, but I can't find it anymore. So after checking a bunch of stuff (did I do all of the steps? Is the system running out of memory or disk space? Is there anything useful in the logs?), I started searching around on the web and found another description of doing the same thing.
This description did not have you build mpv. Instead it recommended installing some more packages:
sudo apt-get install python3 python python-minimal
sudo apt-get install git mpv libmpv-dev
I did that and tried again:
plexmediaplayer --fullscreen --tvAnd got:

Note that the last apt-get installed a prebuilt mpv library. So it's entirely possible that I did not need to do that long build. I have not backed out and tried it without build MPV and I don't intend to.
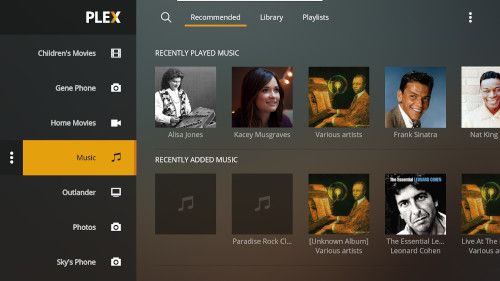
At this point I could log in to my Plex account and see my stuff:
Configuring The System
So with PMP running I need to set things up the way I really want them to work. Several issues I had were with the Raspberry Pi OS. Its a build of Debian Buster with a customized LXDE as the GUI. My GUI of choice is Cinnamon so I am not as familiar with LXDE as I am with Cinnamon.
Starting At Boot
I want to have PMP start at boot in full screen mode and TV mode (just like the command line we saw earlier. On Cinnamon this is an easy thing to do, but the only method I found for LXDE is quite cumbersome and non-intuitive.
The facility we use appears to be intended to put the system into a kiosk mode with only one program running.
In the directory ~/.config/lxsession/LXDE-pi there can be a file named autostart. But by default even the directory does not exist, so I created it and the autostart file. and put @plexmediaplayer --fullscreen --tv in it. This worked, sort of. PMP started, but that was all. No shell started, so if you exited PMP there was just the background picture: no menu, no way to start another program.
Finally after searching around a while I found that you need to start the panel and the file manager if the user is to have a normal experience after closing the default application. So in the end I ended up with the following autostart file:
@lxpanel --profile LXDE-pi
@pcmanfm --desktop --profile LXDE-pi
plexmediaplayer --fullscreen --tv
This does what I want, but man what a pain.
Sound Control
The Roku I am replacing outputs sound on an analog stereo output and on the HDMI output; always both, whether you like it or not. I wanted a little more control. But to start with I got not much control at all. The PI could output to HDMI or to the analog output, but not both.
What I found was that I needed a couple more programs installed. So:
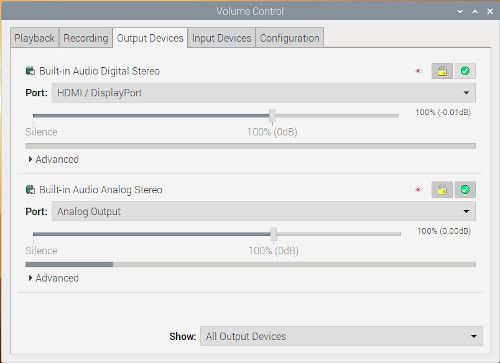
sudo apt-get install pavucontrol paprefThe first time I opened the volume control it looked like this while playing music:
However papref (short for Pulseaudio Preferences) has option switch for simultaneous output. The following dialog box has but a single check box but it fixed my problem.
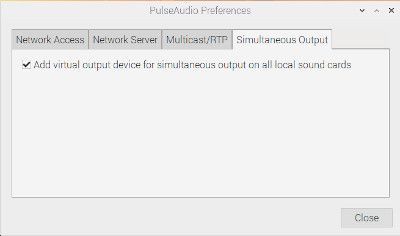
Now we should be able to send audio to both devices at once if we want. But first you have to reboot. (Apparently something needs to restart.)

Now I have a control for each device and one for all devices. I can mute the HDMI and analog separately. So I have what I wanted.
Setting Up the Desktop
Now that I have the system basically working the way I wanted all I needed was to put some shortcuts on the desktop. I wanted easy access to Plex (in case I wanted to restart it), the audio control app discussed above and the web browser.
So I just right clicked on the menu and selected "Add to Desktop". Did that work noooo; when I double click it I get:
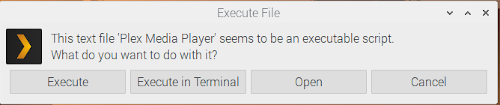
After half an hour searching the internet I found a note that was so cryptic I thought it was a satirical remark. This is the whole message:
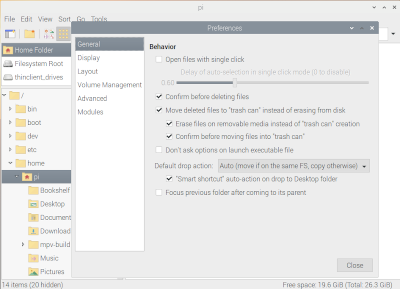
File manager
Edit
Preferences
General
Do not ask option on executable launch

Take out the tick :roll:
Sure enough, to change this activity of the desktop you have to go into the file manger's options and change a setting. (You have to set the tick mark, not clear it, despite the message)
Now when I double click on the Plex Media Player icon it launches PMP. But not in full screen mode (after some messing around, it appears to start is what ever mode it was closed in, so neither full screen or TV mode is forced). Clicking around to figure out settings did no good. The only way I found to fix it was to change the file that described the icon ~/Desktop/plexmediaplayer.desktop. To start with it looks like this:
[Desktop Entry]
Type=Link
Name=Plex Media Player
Icon=plexmediaplayer
URL=/usr/local/share/applications/plexmediaplayer.desktop
So this is just a link to another desktop file. That file is very large and complex and I did not want to either change it or understand it. So I just created a new file that looks like this:
[Desktop Entry]
Version=1.0
Name=Plex Media Player
GenericName=Media Player
Comment=View your media
Exec=plexmediaplayer --fullscreen --tv
Icon=plexmediaplayer
Terminal=false
Type=Application
Categories=AudioVideo;Video;Player;TV;
So this mostly came from /usr/local/share/applications/plexmediaplayer.desktop but I took out a bunch of stuff I did not understand and could not find documentation for and added the options to the Exec entry. This did what I wanted and always launches PMP in full screen a TV mode.
Next up was the Pulseaudio volume control. It really was as easy as right click and choosing "Add to Desktop".
Next I wanted an icon to launch my home web page. This is a little menu system I wrote that can be easily customized for different users. (I'll write about it sometime.) Anyway I wanted a desktop shortcut to it. In Cinnamon you just drag a link from the browser to the desktop. But that didn't work on the PI. So I just wrote one up by hand:
[Desktop Entry]
Type=Link
Name=Web Browser
Icon=chromium-browser
URL=http://your.home.website/
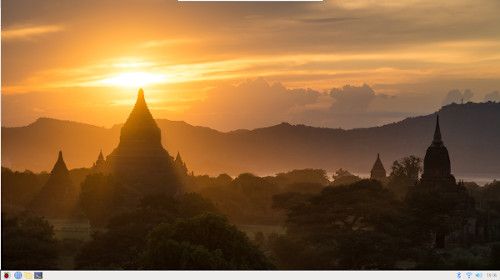
So now my screen looks like this when nothing is running:

I did change the background image, but that's not important.
Final Adjustments
Turn off screen saver. I decided I did not want the system screensaver (which is xscreensaver). PMP has it's own and it won't kick in when you are watching video. Unfortunately, if the screen saver is off, the screen is still blanked after 10 minutes. You can turn this off in "Raspberry Pi Configuration"; but, when you do XRDP doesn't work right anymore. How could that be? It makes no sense.
After digging around a while I found that there is a parameter of consoleblank=0 in the command line in /boot/cmdline.txt, but that did not work either. I still can't solve that problem.
Loose Ends
So, nothing is perfect. The following are still problems:
The IR buttons on the remote control don't work with my Samsung TV. But at least programming them keeps the power button on the remote from turning the PI off. (There is no easy way to turn it back on.)
If you have been using the remote and try to switch to the keyboard. The keyboard won't work until you cycle it's power of use it re-pair function. It's not a big deal, but not easy to explain to non-technical users.
Hooking It Up
So I connected the PI where the Roku was. The results were disappointing, there were two problems. First the sound level was too low and second the screen still blanked after a few minutes.
Audio Problem
The problem with the audio was probably an impedance matching problem between my old amp and the PI. Wikipedia says: "A typical line out connection has an output impedance from 100 to 600 Ω, with lower values being more common in newer equipment." So it is possible that line out from the PI has the low "newer" level and the amp is expecting a higher impedance. I am not well enough versed in electronics to know for sure.
The first solution I considered was to use a small audio pre-amp. Such things do exist and are not expensive. But in researching finding a pre-amp I found that the recommended solution was to use a separate DAC. Most audio aficionados seemed to feel that the PI built in audio was lacking in quality. So I found a nice little DAC:

This works great. The RCA outputs drive my old amp well. It is bus powered so the only connections are the USB and RCA. I'm pretty happy with it.
Video Blanking
I have still not resolved this issue, the video blanks after about 20 minutes, I have tried a number of recommendations from online sources with no luck so far. It's not fatal, and does not affect the audio playback but it is irritating.